In my previous post I talked about what I learnt about IPv6. In this post I want to show you how easy it is to set up IPv6 using pfSense as the router, and Zen Internet (UK) as the ISP.
Request IPv6 from Zen
Email Zen and ask for IPv6, and it should be ready the same day, excluding weekends.
You will receive an email from them with information like this:
Username: zen123456@zen
ND Prefix: 2a02:1243:5687:9ab::/64
Delegation Prefix: 2a02:1244:5687::/48
The two IPv6 prefixes that are now assigned to your service are described below, along with some helpful IPv6 information: /64 Neighbour Discovery (ND) Prefix. This is used to automatically address the WAN interface of your Router, or if you are directly connected without a router, the WAN interface of that device. This can be configured using SLAAC.
/48 Delegation Prefix. This is usually provided over DHCPv6, and requires that your router acts as a requesting router for the purpose of IPv6 delegation RFC3633 -(https://tools.ietf.org/html/rfc3633). Subnets of this prefix are used by the CPE to address devices on the LAN.
Make sure pfSense allows IPv6
Go to System->Advanced->Networking and make sure Allow IPv6 is checked.
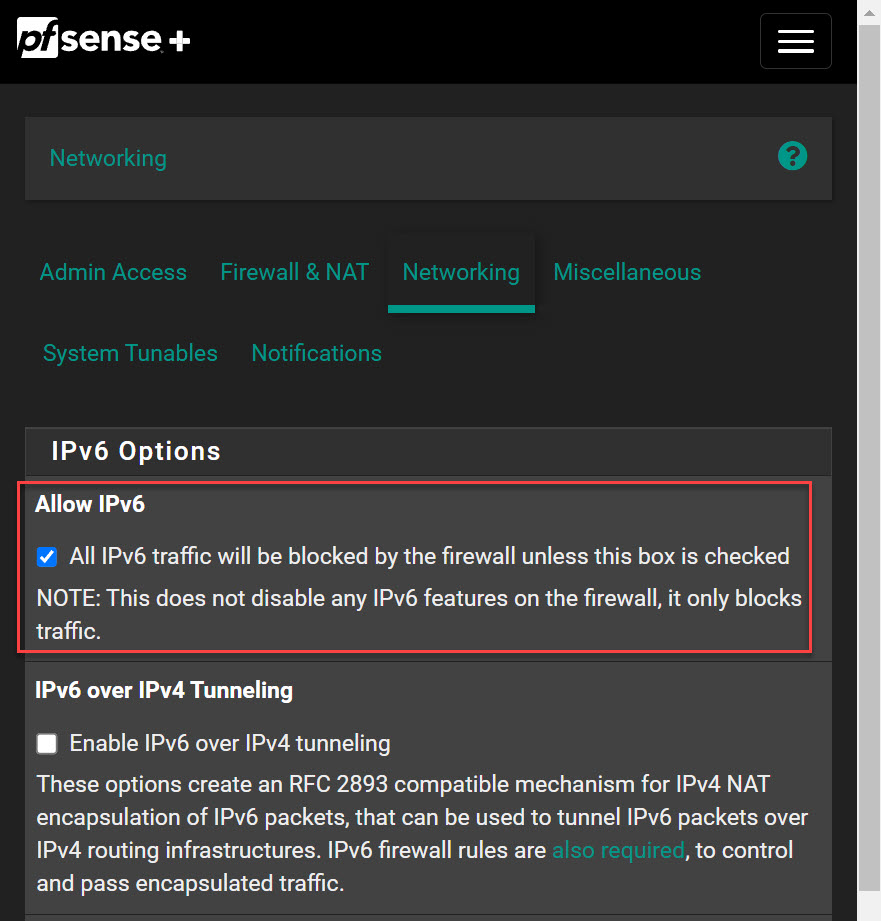
On this same page make sure Prefer IPv4 over IPv6 is unchecked if you want IPv6 to be used by default.
Set up the WAN interface in pfSense
Go to Interaces->WAN interface, set the IPv6 Configuration Type to DHCP6, which tells your router to get its public IPv6 from Zen’s DHCPv6 server.
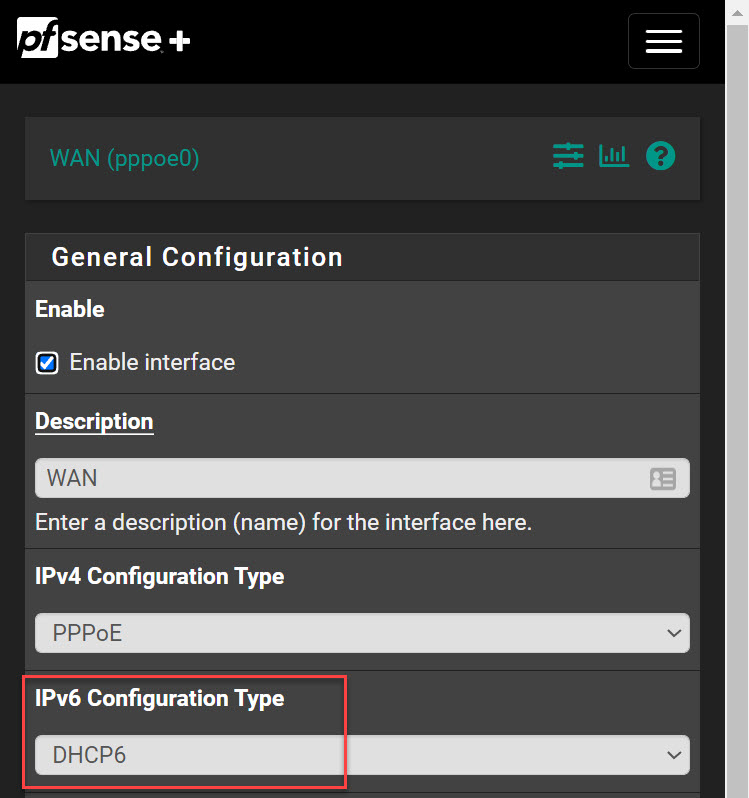
Make sure that Request a IPv6 prefix/information through the IPv4 connectivity link is checked. This tells pfSense to use the PPPoE connection.
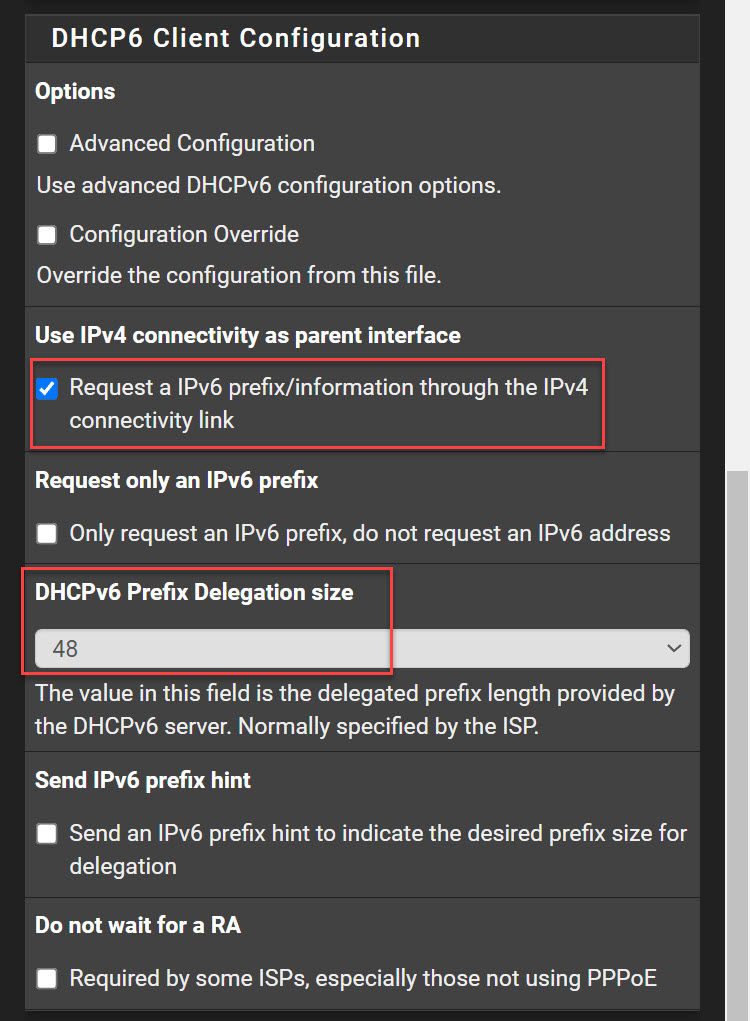
Make sure the DHCPv6 Prefix Delegation size matches what Zen sent you.
Set up your LAN interface
Go to Interfaces->LAN
Set the IPv6 Configuration Type to Static IPv6. This will allow you to choose a subnet for the LAN. If you have multiple interfaces (e.g. for WIFI, DMZ, etc) you will need to do the same for these.
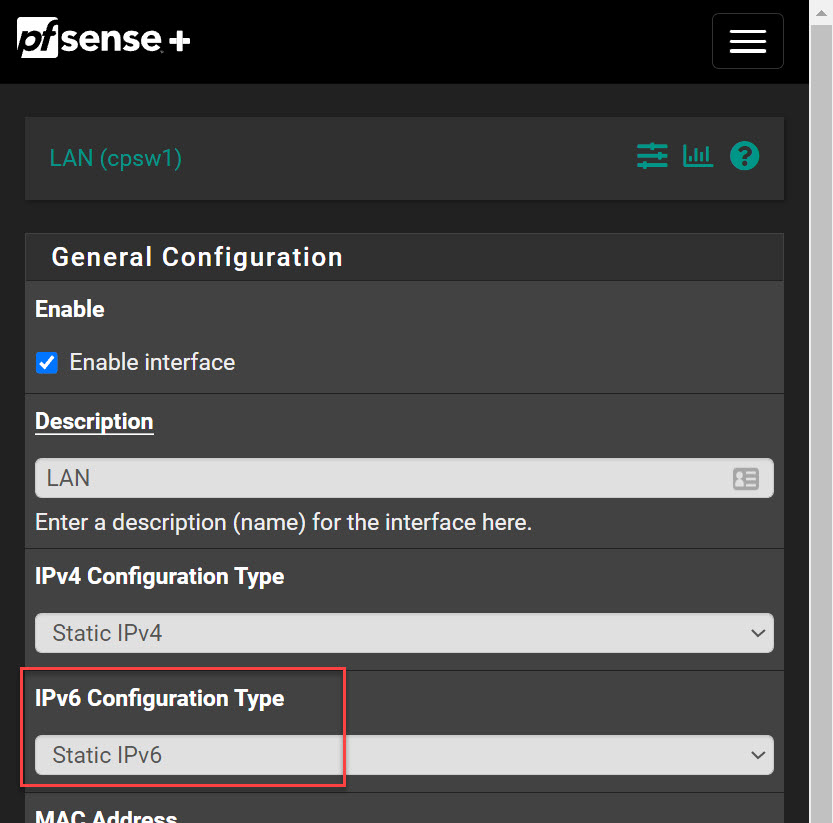
Enter a static IPv6 address for your LAN interface, this will be the Delegation Prefix given to you by Zen, followed by : and then you can choose a subnet value from 0000 - ffff and a value for the interface itself. I chose beef for the subnet and ::1 for the interface. I blanked out the second and third portion of my delegation prefix for privacy reasons.
Set the network prefix to /64.
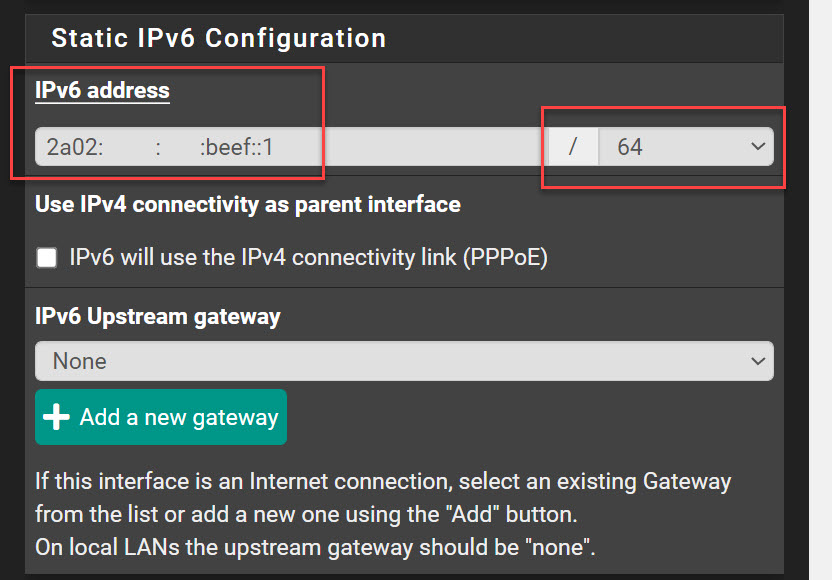
Set the upstream gateway to None.
Enable SLAAC
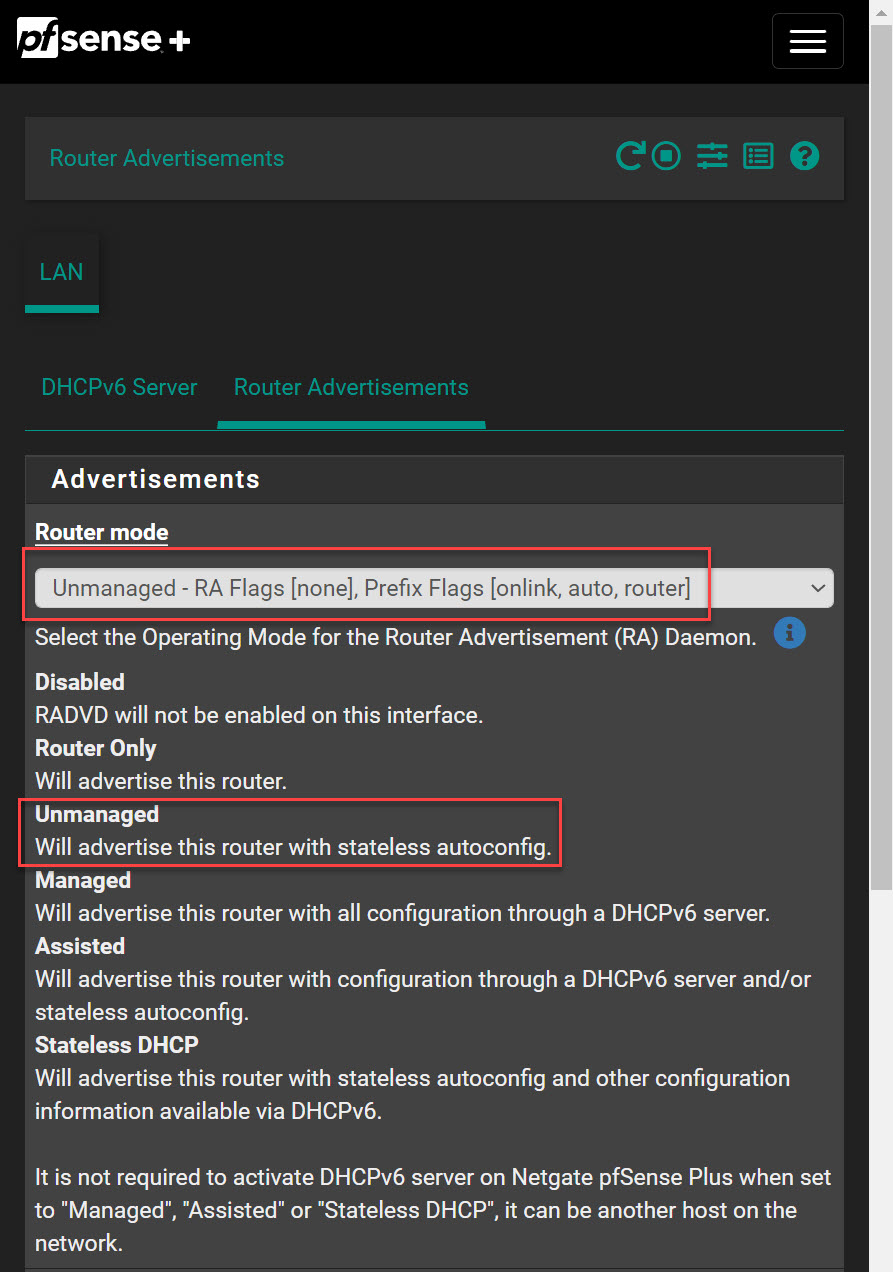
Go to Services->DHCPv6 Server & RA and make sure DHCPv6 Server is unchecked, then select Router Advertisements tab.
Change the Router mode to Unmanaged. This will set the router to use SLAAC (auto-configuration) only without DHCPv6 (you do not need this at home).
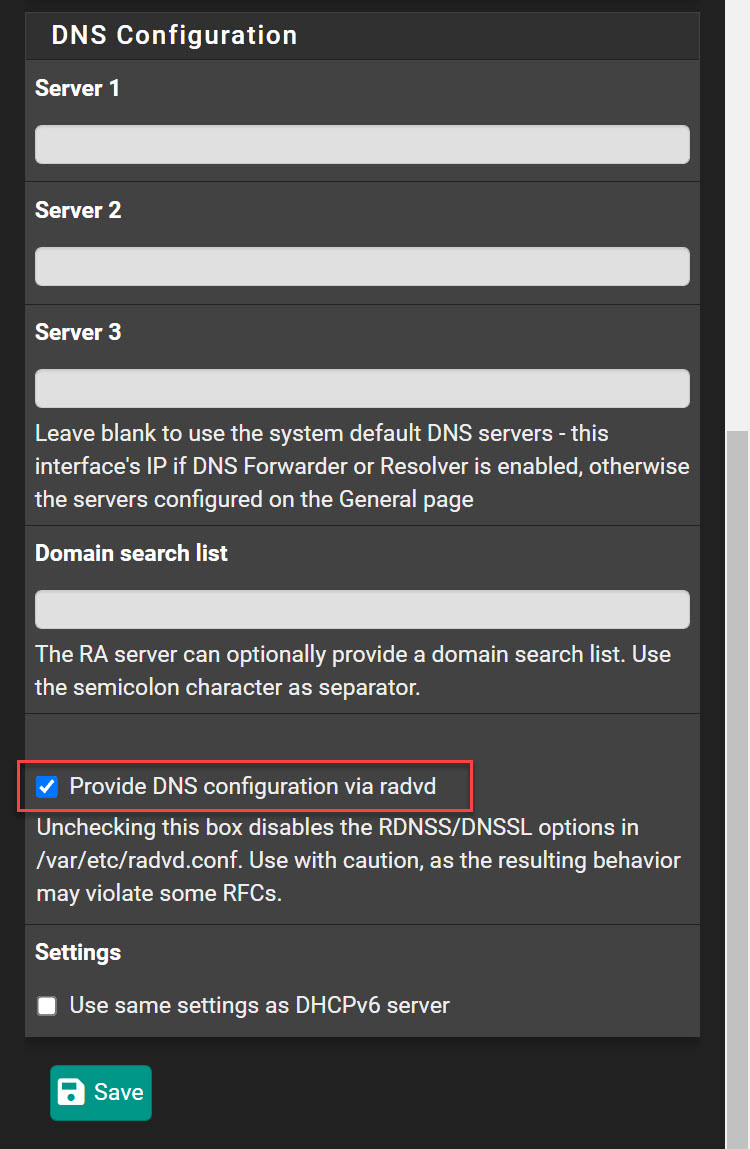
On the same page ensure that Provide DNS configuration via radvd is checked.
Reboot
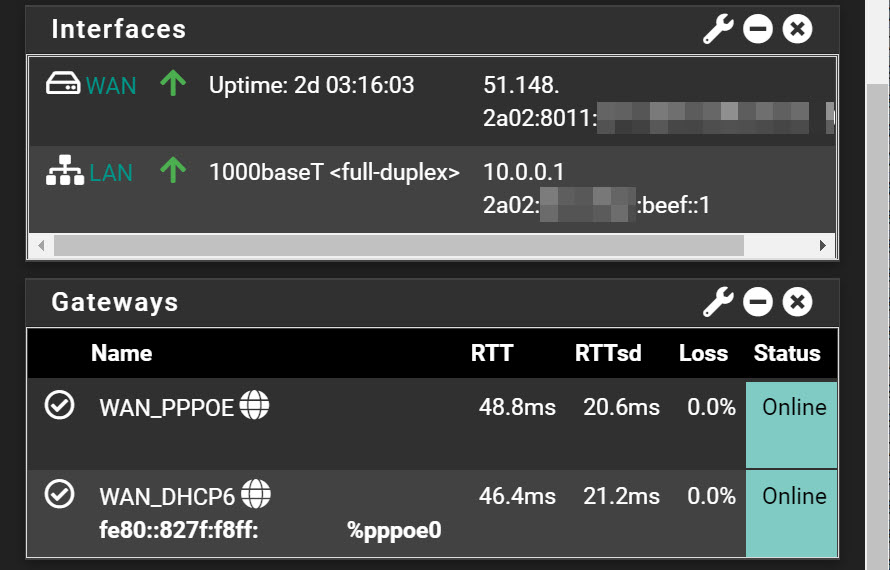
You should reboot your router at this point, I didn’t do this at first and found that the router did not respond to router solicitations. When it comes back up check your WAN IP addresses and WAN gateways have IPv6 addresses. Your LAN interface should also have a static public IP now.
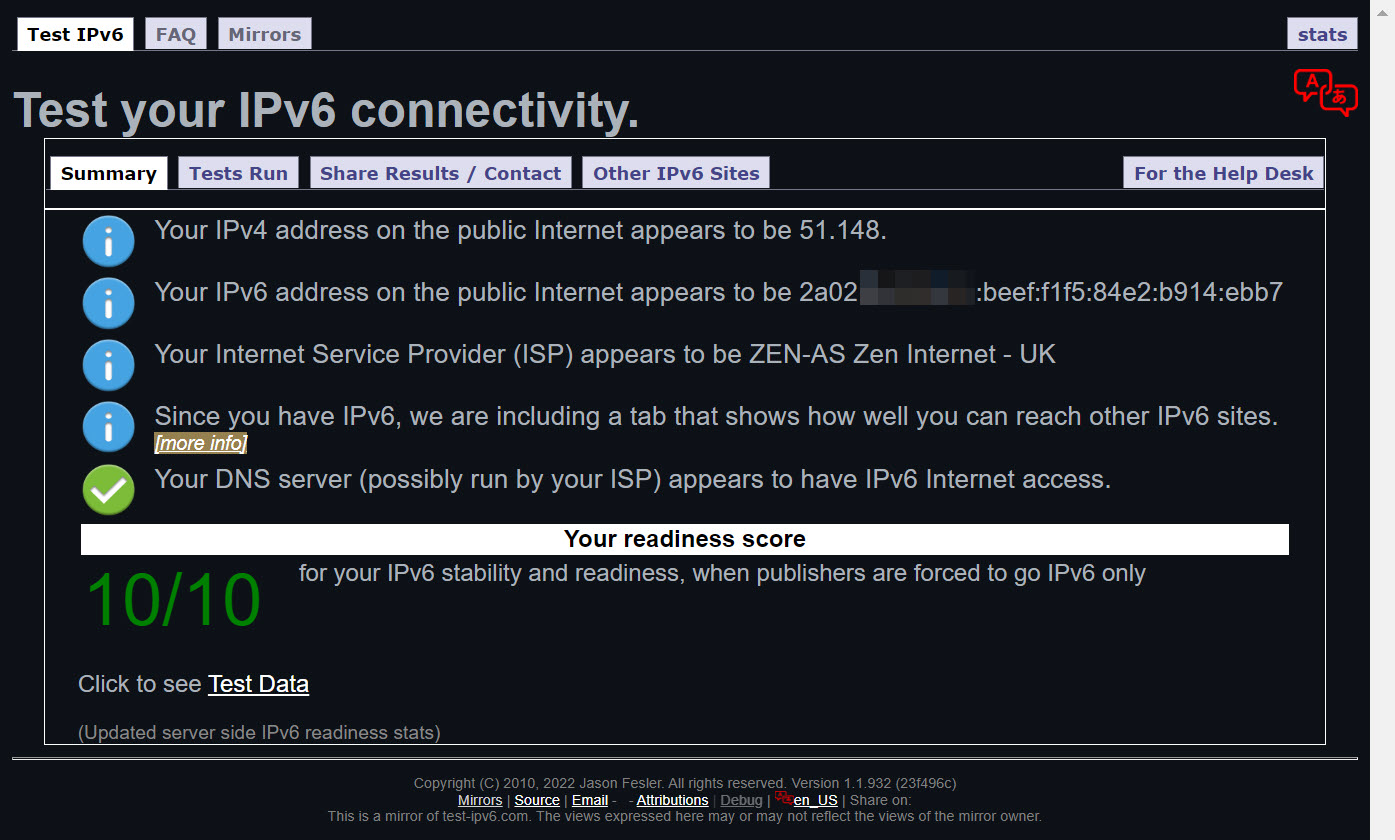
Finally, reboot your computer so it will get a IPv6 address and then go to https://test-ipv6.com/ to check.
Go to Diagnostics->NDP Table to see if neighbors are being discovered using SLAAC. There should be a few entries in here now, but might not grow until other devices are rebooted.
Firewall rules
You will probably want to change your firewall rules to accommodate IPv6. You don’t want to inadvertently be blocking it so go through those carefully.
e.g. Your LAN any to any rule should now include IPv6
